
In summary, here are the steps to withdrawing your Adsense earnings:
- Get your payment receipt from your Google Adsense dashboard
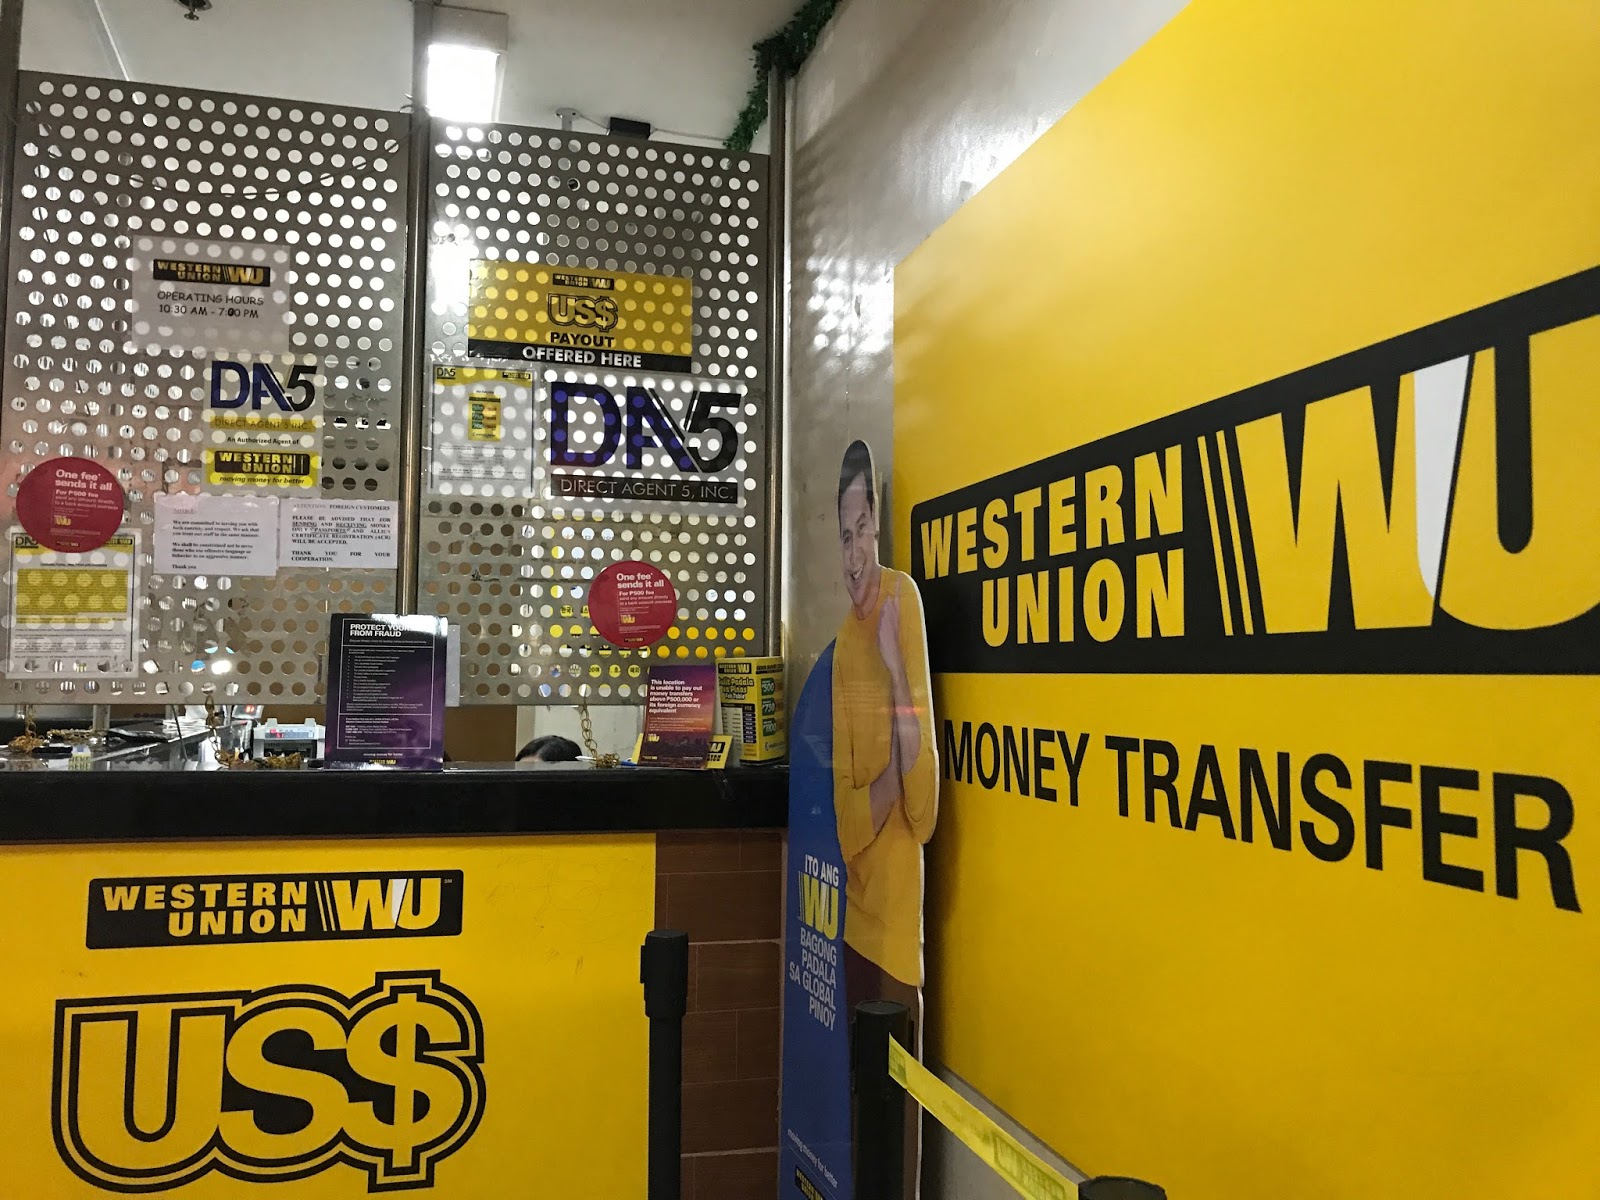
- Go to Western Union or any Western Union agent (bring a valid ID)
- Request for a money transfer, then wait for your cash
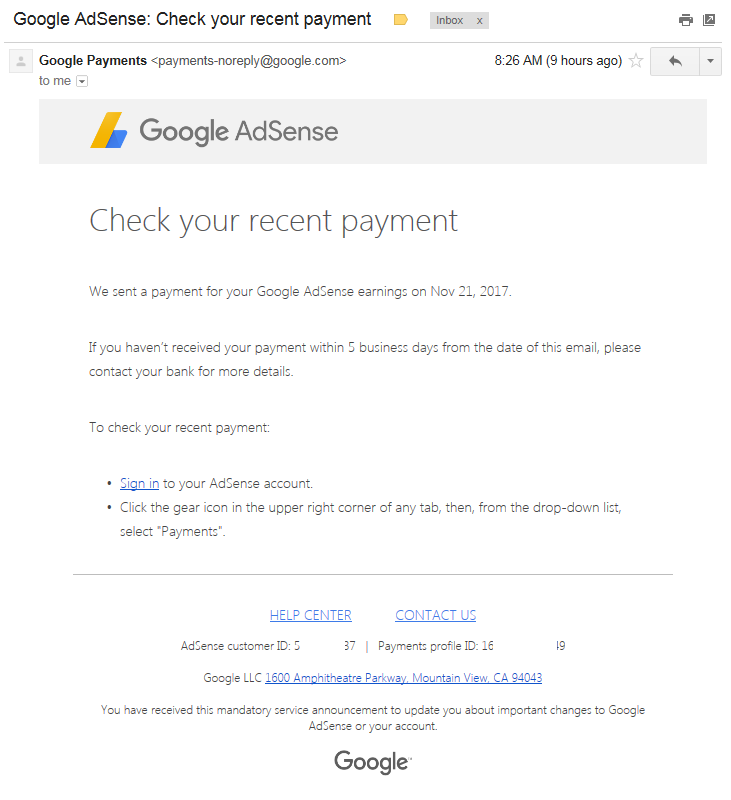
Okay. Note that Google Adsense issues payments every 21st of the month as soon as you've reached the $100 threshold. Then, you'll receive an email notification from Google Payments that your earnings have been processed. It's a sign that your payment is ready to be claimed. The email looks like this:
Find your payment receiptNow let's find your payment receipt. It contains info you need to cash out at Western Union.
Login to your Adsense account and navigate to Settings, then Payments. Under the Transactions section, click on the most recent one.
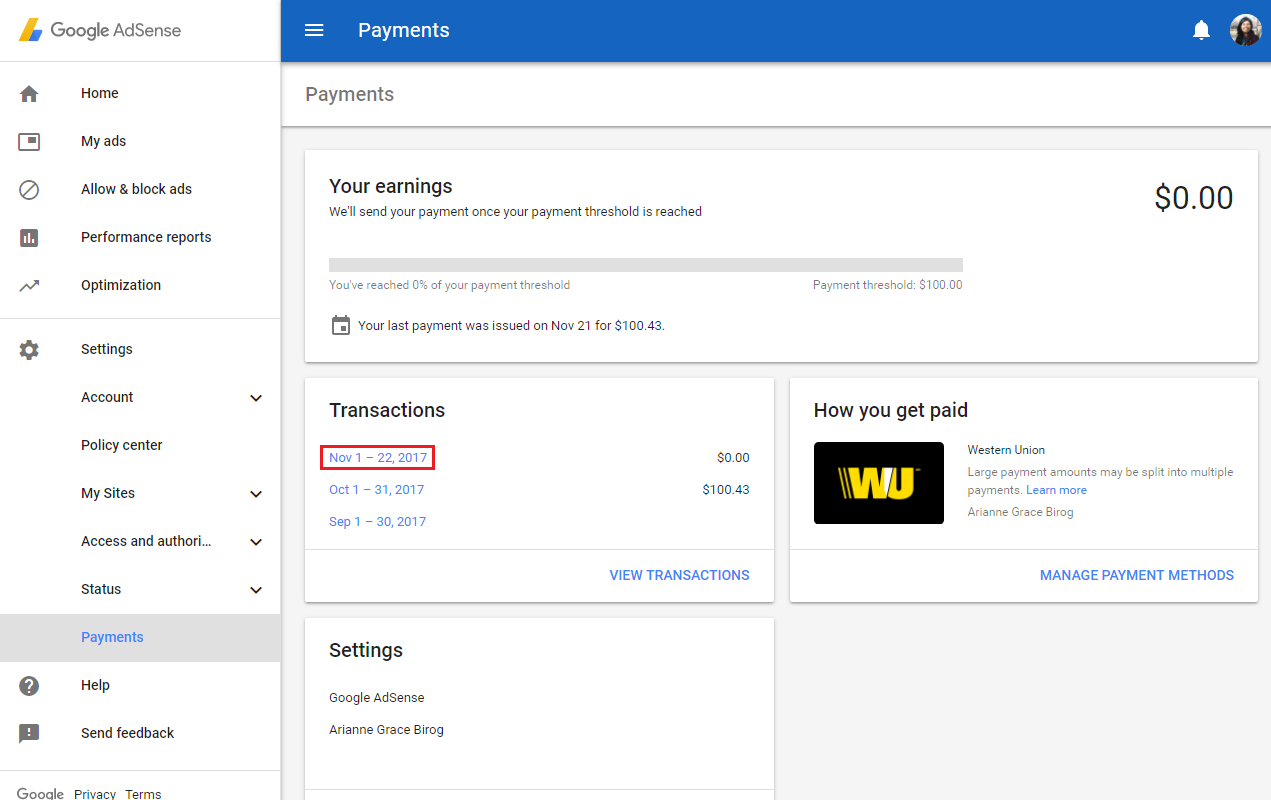
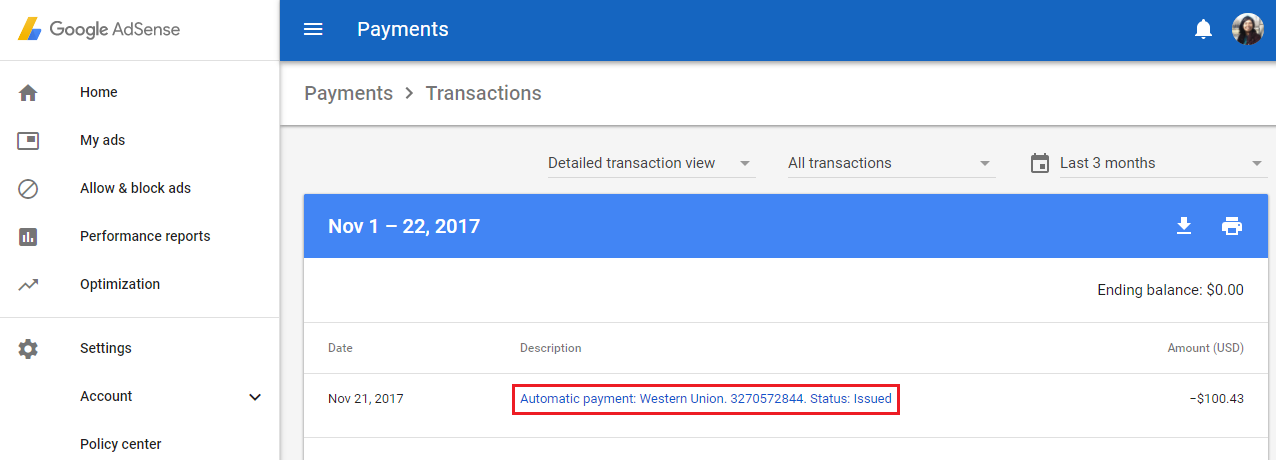
Check the description, If the status reads ISSUED, then you're good! Click on the description to reveal your payment receipt.
Here's how the payment receipt looks like:
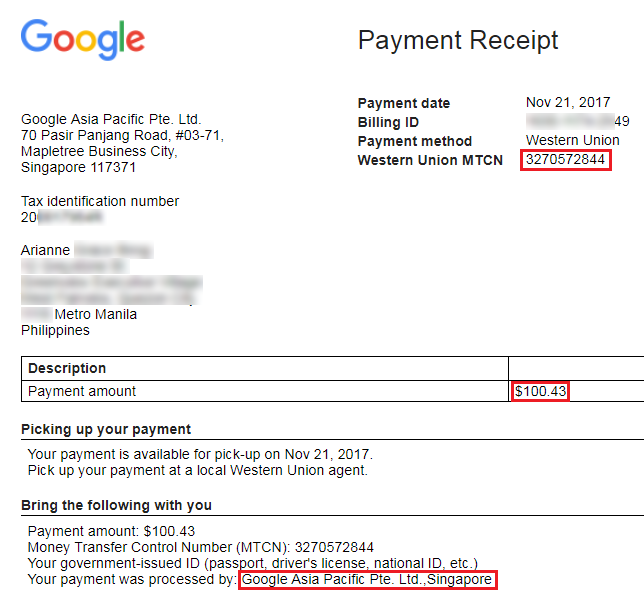
I highlighted the important details in red. Or quite simply, just take note of the details at the bottom part, under Bring the following with you.
Go to Western Union or any accredited WU agentYou don't have to print the details, just make sure you have it with you because you need those in filling out the money transfer form.
Here's a WU agent locator to help you out: http://www.payment-solutions.com/agent.asp
In my case, I went to Sanry's Money Changer in Greenbelt 1, it has a Western Union outlet inside which is great because I can get my dollars from WU, then exchange it to peso via Sanry's. It's a two-step process but it's better because local money changers usually have higher exchange rates than WU. WU exchanges at ₱49 point something per dollar, whereas Sanry's offers ₱50.73 per dollar during that time. Also, you can ask WU to exchange your earnings directly to Sanry's so you only have to line up once. The two merchants share the same space and their counters are just adjacent to each other.
But of course it depends on you. WU can directly convert your earnings into peso if that's what you want. Just giving you options in case there's a money changer nearby! :)
Before I came to Sanry's, I actually inquired at Czarina Foreign Exchange first because it's nearer. Some money changers are authorized WU agents. Unfortunately their WU processing could take 30 minutes according to the staff because it has to be approved by the head office. I couldn't wait that long so I went to an actual WU outlet instead.
Finally,
Filling out the formYou'll be given a To Receive Money form which you should fill out using your personal details and the ones in your Payment Receipt. Don't forget to bring a valid ID. Here's a sample form I filled out. The personal details are made up for illustration purposes only.
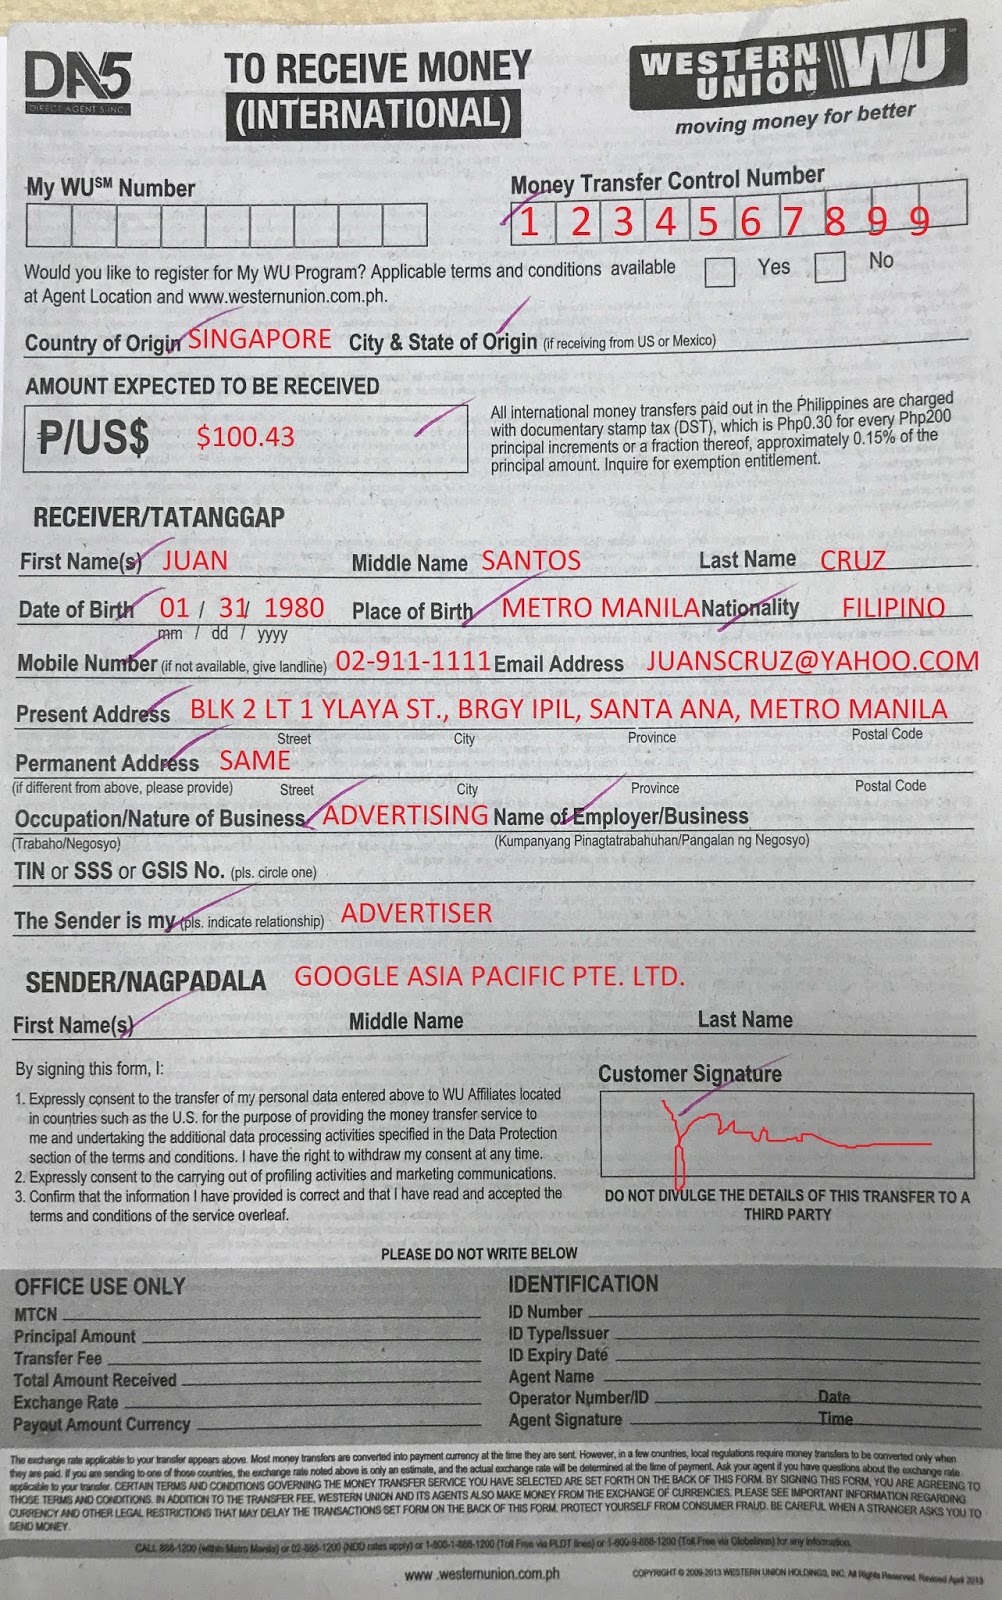
- Money Transfer Control Number (MTCN) can be found from your Payment Receipt.
- Country of Origin refers to the Google office who processed your payment, in my case it's Singapore.
- Amount expected should be exactly what it states in your payment receipt. I'm not sure if it's possible to cash out just a fraction of your earnings hehe.
- For Occupation/Nature of Business, I just put Advertising.
- For the Sender relationship, just put Advertiser.
- For the Sender name, I put the company name who sent my payment. That is, Google Asia Pacific Pte. Ltd.
Hope this helps! And hopefully will get to reach threshold again soon. Hahaha.